If you use Mailchimp to manage your email marketing efforts, WP Popups can help you create email opt-in popups that connect directly to your email lists in Mailchimp.
In this article, you’ll learn how to connect WP Popups to Mailchimp and start creating email opt-in popups.
How to Connect WP Popups to Mailchimp
1. Generate Mailchimp API Key
To get started, you need to generate an API key from your Mailchimp account.
To do this…
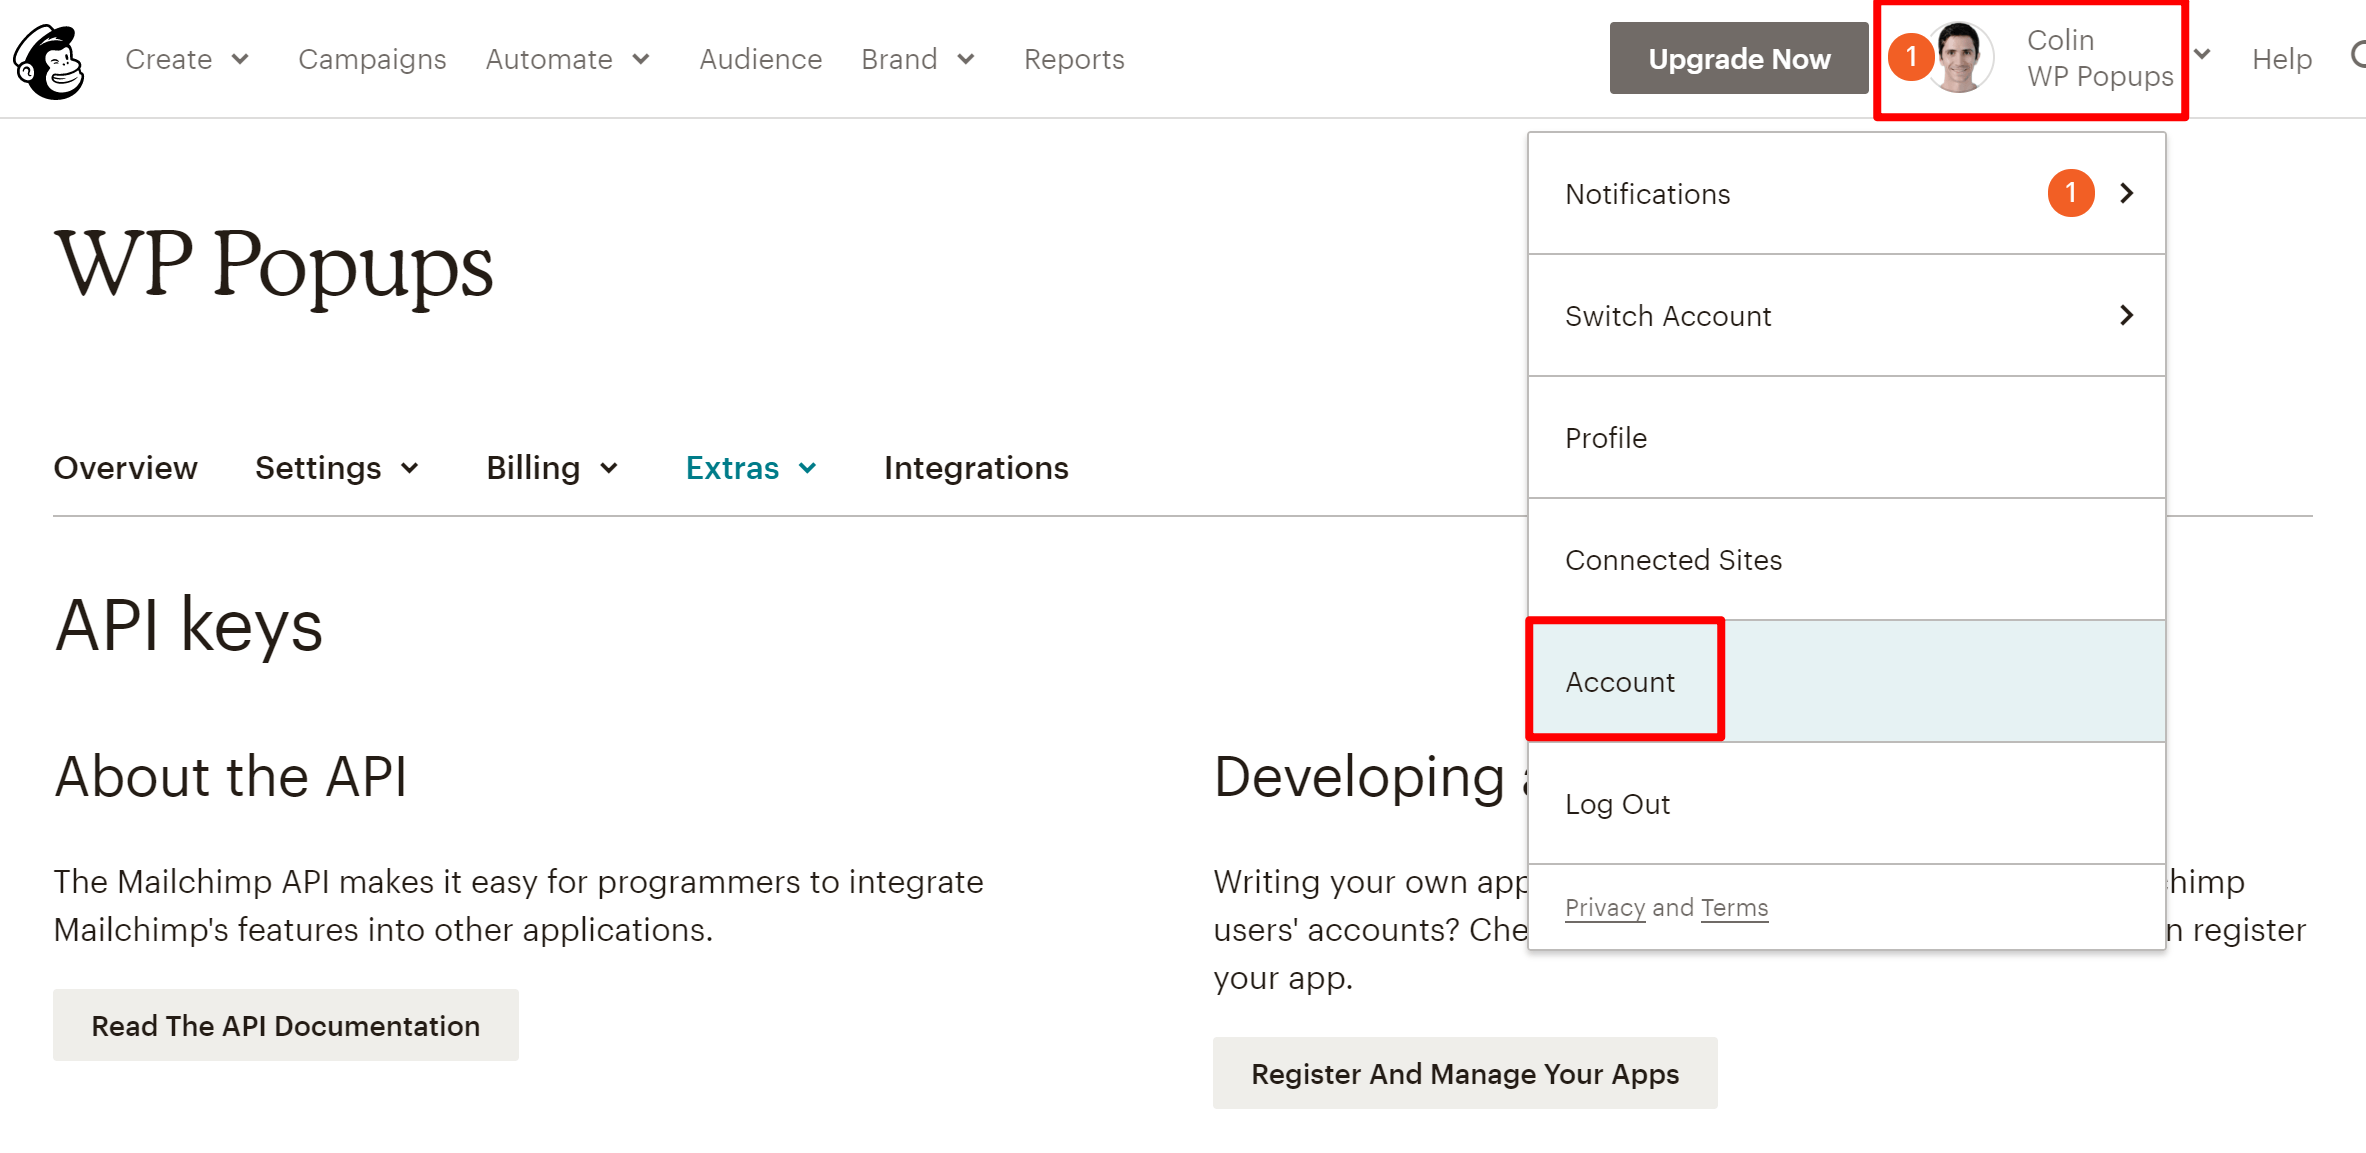
- Log in to your Mailchimp account
- Click on your account name in the top-right corner
- Select Account from the drop-down
Then…
- Click on the Extras tab
- Select API Keys from the drop-down

In the Mailchimp API Keys interface, scroll down to the Your API keys list and click Create a Key:

Then, look for your API key in the API key column. Keep this value accessible because you’ll need it in the next step:

2. Add API Key to WP Popups Integrations
Next, open your WordPress dashboard and…
- Go to WP Popups -> Settings
- Click on the Integrations tab
- Select Mailchimp to expand its options
- Click on the Add New Account button

Then, paste in your API key and give this account a nickname.

Once you’ve entered your API key, click Connect to Mailchimp.
After a short wait, you should see that your account is successfully connected:

3. Create a Mailchimp Email Opt-in Popup
To create an email opt-in popup that connects to your Mailchimp account, go to WP Popups -> Add New.
Then, select your desired popup template – you can use any style template.
In the WP Popups template builder:
- Go to the Email Marketing tab
- Select Mailchimp
- Click the Add New Connection button
- Give your connection a nickname
- Click OK

Then…
- Use the Select Account drop-down to select which Mailchimp account to use (if you connected multiple Mailchimp accounts)
- Use the Select List drop-down to select which Mailchimp list to add subscribers to
- Configure other basic settings like whether or not to use double opt-in and/or send a welcome email
- Click Save Connection

Now, you can use the other settings in the WP Popups template builder to configure the style and appearance of your email opt-in popup, as well as where and when it appears.