The Newsletter plugin at WordPress.org is one of the most popular WordPress newsletter and email marketing tools. It helps you grow your lists and send emails right from your WordPress dashboard.
With the WP Popups Newsletter Plugin addon, you can use WP Popups to create email opt-in popups that automatically connect to your subscriber lists in the Newsletter plugin.
How to Connect WP Popups to the Newsletter Plugin
For this tutorial, we will assume that you’ve already installed the Newsletter plugin and set up some lists. If not, you can consult the documentation for the Newsletter plugin.
1. Install the WP Popups Newsletter Plugin Addon
To get started, you need to install the Newsletter Plugin addon for WP Popups. You can download the addon from your WP Popups Downloads page. Learn more about how to install a WP Popups addon.
2. Set Up WP Popups Newsletter Integration
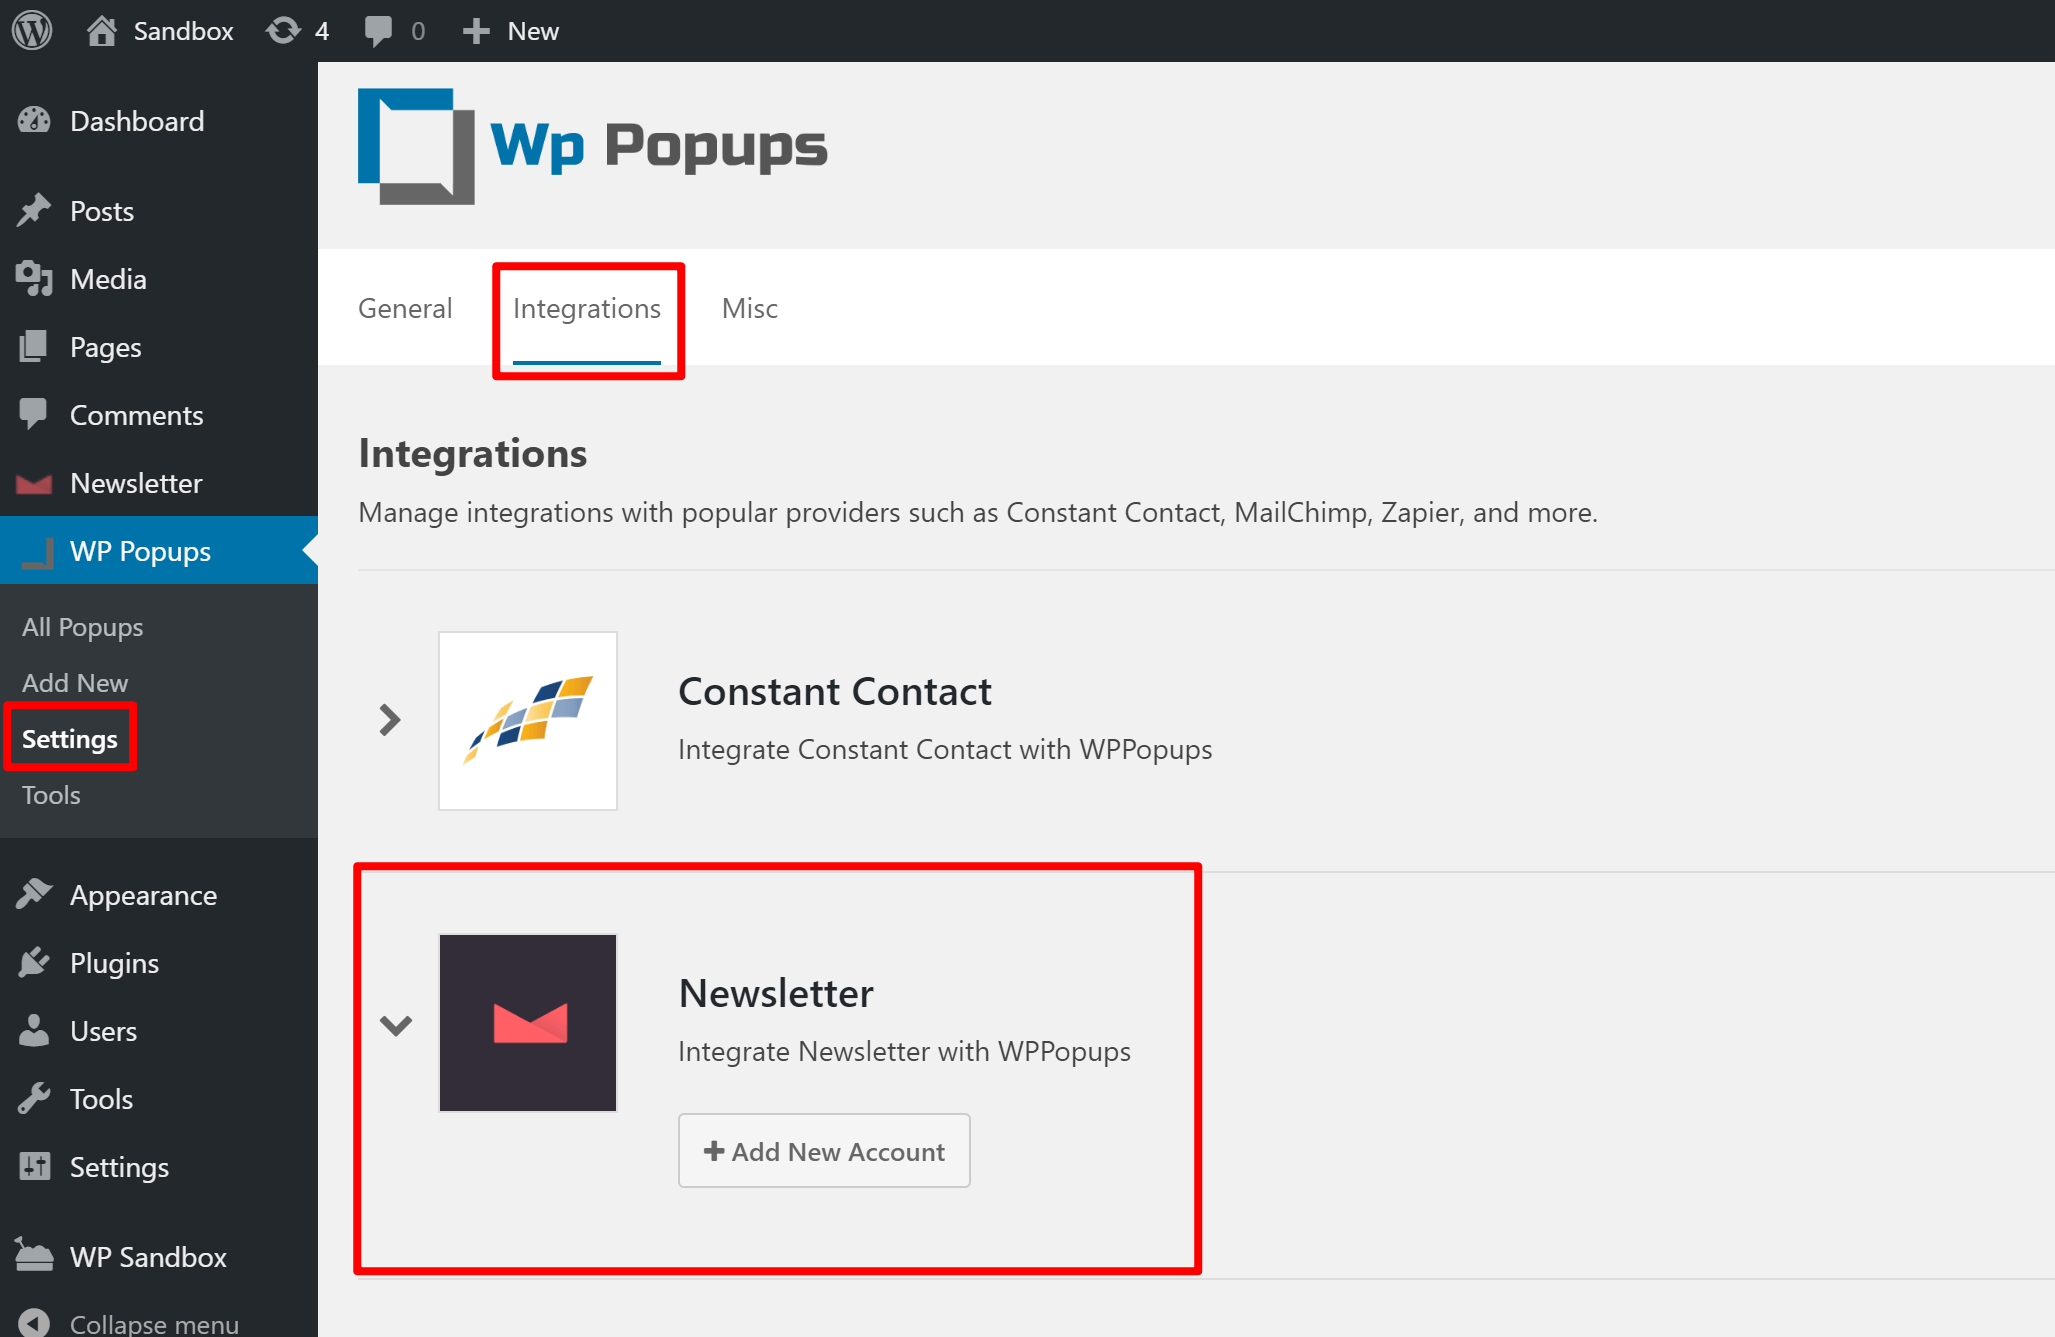
Next, open your WordPress dashboard and…
- Go to WP Popups -> Settings
- Click on the Integrations tab
- Select Newsletter to expand its options
- Click on the Add New Account button
Then, give your integration a nickname to help you remember it and click Connect to Newsletter:

Next, you should see a success message telling you that your Newsletter account is connected:

3. Create a Newsletter Email Opt-in Popup
To create an email opt-in popup that connects to your Newsletter plugin lists, go to WP Popups -> Add New.
You can select any popup style template for your email opt-in popup. Or, you can create a blank popup template.
In the WP Popups template builder:
- Go to the Email Marketing tab
- Select Newsletter
- Click the Add New Connection button
- Give your connection a nickname
- Click OK

Then…
- Use the Select Account drop-down to select which Newsletter account to use – you’ll see the nickname that you created in step #2.
- Use the Select List drop-down to select which Newsletter list to add subscribers to
- Click Save Connection

To finish creating your email opt-in popup, you can use the settings in the WP Popups template builder to configure the design of your popup and control where and when it appears to visitors.